🗻DAY 1
Lemosho Gate to Mti Mkubwa Camp
Distance: 4.8 km / 3 mi
Trekking Time: 3-4 hours
Habitat: Rainforest
Elevation: 2,389 m (7,838 ft) → 2,785 m (9,137 ft)
Altitude Gain: 396 m
Meals: Lunch, Dinner
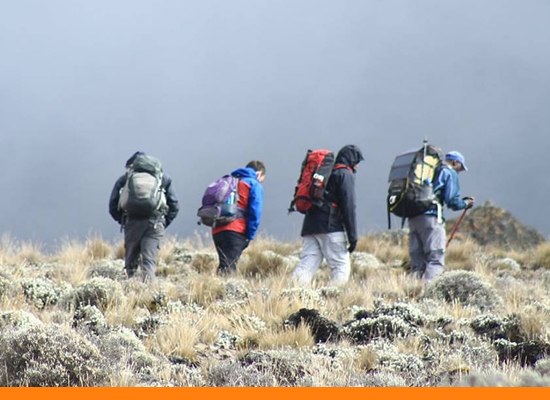
Start your adventure with a scenic 3-hour drive from Moshi to the Lemosho Gate. Here, you’ll register and meet your trekking team. The hike begins with a gentle trail through lush rainforest, home to towering trees, vibrant vegetation, and wildlife such as colobus monkeys and exotic birds. The forest trail can be muddy and slippery, so trekking poles and gaiters are recommended.
You’ll arrive at Mti Mkubwa Camp for a well-deserved meal and rest amidst the serene forest.
🌿 DAY 2
Mti Mkubwa Camp to Shira 1 Camp
Distance: 7 km / 4.3 mi
Trekking Time: 6-8 hours
Habitat: Moorland
Elevation: 2,785 m (9,137 ft) → 3,895 m (12,779 ft)
Altitude Gain: 1,110 m
Meals: Breakfast, Lunch, Dinner
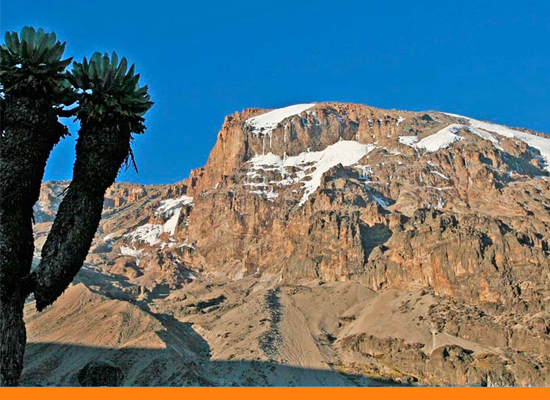
After breakfast, the trail ascends out of the rainforest and into the moorland zone. The landscape transforms, offering expansive views of the Shira Plateau and Mount Meru in the distance. Unique flora like giant lobelias and senecios thrive here. The climb is steady, with breaks for lunch and photos.
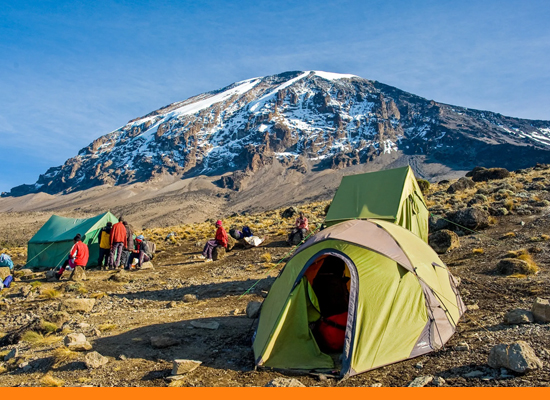
By evening, you’ll arrive at Shira 1 Camp, located on the plateau, where you’ll enjoy dinner and watch a stunning sunset over the plains.
🌄 DAY 3
Shira 1 Camp to Lava Tower to Barranco Camp
Distance: 10.1 km / 6 mi
Trekking Time: 5-7 hours
Habitat: Semi-desert
Elevation: 3,895 m (12,779 ft) → 3,986 m (13,077 ft) via 4,630 m (15,190 ft)
Altitude Gain: 91 m (net) / 735 m (highest point)
Meals: Breakfast, Lunch, Dinner
Today is a critical acclimatization day. The trek leads to Lava Tower, a volcanic rock formation known as “Shark’s Tooth,” standing at 4,630 m. The terrain becomes arid and rugged, with sweeping views of the surrounding peaks. After lunch at Lava Tower, descend to Barranco Camp through scenic valleys dotted with giant senecios. This descent aids acclimatization and prepares you for tomorrow’s climb. The night at Barranco Camp offers breathtaking views of the towering Barranco Wall.
🧗 DAY 4
Barranco Camp to Karanga Camp
Distance: 5.2 km / 3 mi
Trekking Time: 4-5 hours
Habitat: Alpine Desert
Elevation: 3,986 m (13,077 ft) → 4,034 m (13,253 ft)
Altitude Gain: 48 m
Meals: Breakfast, Lunch, Dinner
The day begins with the thrilling ascent of the Barranco Wall, a steep rock face that requires careful maneuvering but is non-technical.
As you climb, enjoy incredible views of the Karanga Valley and the surrounding landscape.
After reaching the top, descend into the valley before climbing again to Karanga Camp.
This shorter day is designed for acclimatization and provides ample time to rest and prepare for the higher altitudes ahead.
🌌 Day 5:
Karanga Camp to Barafu Camp
Distance: 3.3 km / 2 mi
Trekking Time: 4-5 hours
Habitat: Alpine Desert
Elevation: 4,034 m (13,253 ft) → 4,662 m (15,295 ft)
Altitude Gain: 628 m
Meals: Breakfast, Lunch, Dinner
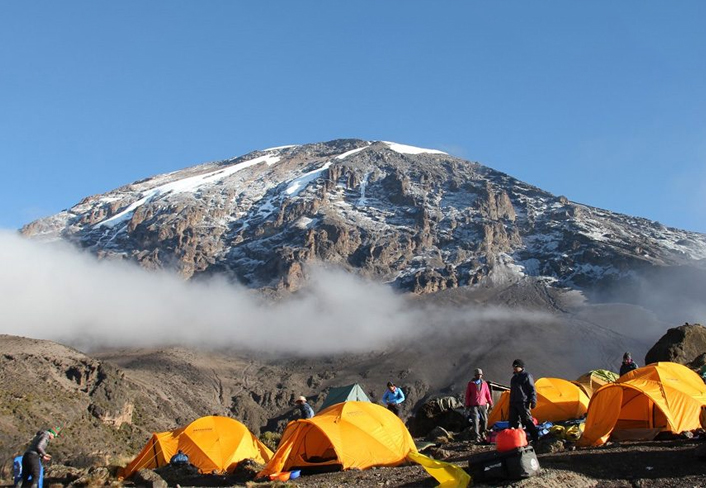
Trek through a barren, rocky landscape to reach Barafu Camp, the base camp for your summit attempt.
Along the way, enjoy stunning views of Mawenzi and Kibo peaks. Once at Barafu, the afternoon is spent resting, hydrating, and preparing gear for the summit push.
After an early dinner, head to bed for a few hours of sleep before the midnight departure.
🌳 Day 6:
Barafu Camp to Uhuru Peak to Mweka Camp
Distance: 5 km / 3 mi (ascent) + 11.5 km / 7.2 mi (descent)
Trekking Time: 12-15 hours
Habitat: Arctic Zone / Alpine Desert
Elevation: 4,662 m (15,295 ft) → 5,895 m (19,341 ft) → 3,090 m (10,150 ft)
Altitude Gain: 1,233 m
Altitude Loss: 2,805 m
Meals: Breakfast, Lunch, Dinner
The summit push begins at midnight, ascending through freezing temperatures and rocky terrain to Stella Point (5,739 m).
From here, a final effort leads to Uhuru Peak, the highest point in Africa. Witness a breathtaking sunrise and celebrate your achievement.
After taking photos and soaking in the views, descend to Barafu Camp for lunch and rest before continuing to Mweka Camp for the night.
🌳 Day 7:
Mweka Camp to Mweka Gate
Distance: 9.1 km / 5.7 mi
Trekking Time: 3-4 hours
Habitat: Rainforest
Elevation: 3,090 m (10,150 ft) → 1,640 m (5,380 ft)
Altitude Loss: 1,450 m
Meals: Breakfast, Lunch
After breakfast, descend through the lush rainforest to Mweka Gate, where you’ll receive your summit certificates.
The trail is often wet and slippery, so gaiters and trekking poles are recommended.
From the gate, you’ll be transferred back to Moshi to celebrate your incredible achievement.
Are You Interested Book Now